Sunday, August 19, 2012

Spiced Teff Bars


Summer is my favorite time of year. No doubt about that. But lately, the cooler temps we’ve been experiencing have my mind drifting towards cinnamon spiced treats. Nothing says autumn like cinnamon!   


Now, these tasty treats are made with teff. Don’t worry if you’ve never heard of it. Many people are unfamiliar with this grain. Teff has a long history and has been used for ages in North Africa. More specifically; teff is used in Ethiopian cuisine to make injera, which is an Ethiopian spongy flatbread that tastes a bit like sourdough.  Fun fact: teff is one of the smallest grains in the WORLD! 

Health benefits of teff:
  • high in fiber
  • good source of protein
  • great source of iron
  • good source of calcium
Teff has a very distinct and almost earthy taste to it that goes well with the spices and molasses in these bars. These guys seriously taste out-of-this-frickin-world with a cup of coffee! 

Spiced Teff Bars
the original recipe is over at Whole Life Nutrition Kitchen
I only made a few tiny changes though (added some more spices)!

2/3 cup of softened coconut oil
1/3 cup unsweetened applesauce
1/3 cup blackstrap molasses
1/2 cup Sucanat
1 Tbsp. maple syrup or agave
1 Tbsp. vanilla extract
2 cups dark teff flour
1/2 cup tapioca flour
1 teaspoon baking soda
1 teaspoon guar gum (or xanthan gum)
1/2 teaspoon sea salt
1 tablespoon cinnamon
1 to 2 teaspoons ground ginger (I didn't have any, so just used some minced/pureed ginger)
1/4 teaspoon ground cloves
1/4 teaspoon ground cardamom
1/8 teaspoon nutmeg or allspice
  1. Preheat oven to 350 degrees F. Oil a 9x9 square pan or line with parchment paper.
  2. In large bowl, use an electric mixer to mix the coconut oil, applesauce, molasses, sugar, maple syrup and vanilla until combined.
  3. In another bowl, mix together the dry ingredients and spices. Add the dry ingredients to the wet and beat again until dough thickens. 
  4. Spread the dough into prepared baking pan.
  5. Bake for about 25 minutes in preheated oven at 350. Let the bars cool for at least 30 minutes before trying to cut. Serving suggestion: drizzle some coconut butter on top!
Note: I've found that these need to be stored in the fridge because they tend to crumble if left out at room temp. 


Friday, August 10, 2012

Raspberry Peach Fruit Leather


Since we're knee-deep in summer right about now, I can only hope that you're making the most of it by enjoying many bucketfuls of fresh fruit! For the bucketfuls of fruit that won't fit in your mouth, stretch that berry goodness by making some fruit leather.

Have you ever looked at the ingredients in fruit roll-ups that you buy in the store? It's ridiculous!
  • corn syrup
  • more corn syrup
  • sugar
  • preservatives
  • artificial coloring and flavoring
Why not make something at home that won't put your kids in an early grave!


Ingredients
  • 1 peach (washed, peeled if desired)
  • 1 cup organic raspberries (I used frozen)
  • 3/4 cup organic applesauce (or about two of those little applesauce cups)
  • 2 Tbsp. honey or agave nectar (optional) but raspberries can be a bit tart, so I suggest you add the sweetener
  1. Since I hate berry seeds, I blended my frozen raspberries with a tiny bit of water in a blender. Then, using a fine mesh strainer, strained the blended raspberries to get the seeds out.
  2. Return strained raspberry puree to blender. Add the applesauce and honey to blender. Blend for a few seconds. 
  3. Take a little bit of coconut oil (or cooking spray, even) and rub it on your dehydrator sheets. 
  4. Spread the fruit mixture over two dehydrator sheets. (Mine have big circles in the middle of them). 
  5. Dehydrate for 6-8 hours at around 120-125 degrees F. The temperature and timing will depend on your dehydrator. Like I said, my dehydrator has circular sheets with holes in the middle. You may have to adjust! Good luck!

Friday, July 20, 2012

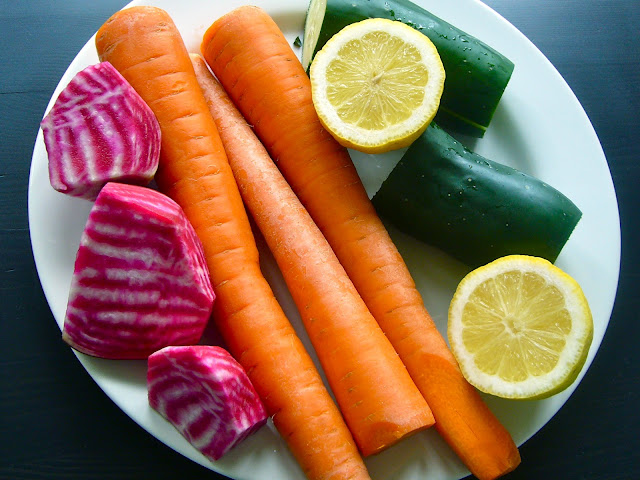
Sunrise Energize - juice


To be honest, the end result of juicing isn’t all that photogenic (at least when you're adding carrots to the greens). Mixing neon orange carrot juice to electric green gives way to an unappetizing muddy-brown color. But I can assure you that the juice tastes much better than it looks!

So … here’s a tasty juice I made the other day.  Usually when I first wake up I don’t want a juice that’s heavy on the greens. I save those juices for later in the day. This juice is definitely a sweet one! Here is a nutritional breakdown of the juice (with the exception of the fiber part): Holy vitamin A!!!!

Sunrise Energize

  • 1/2 beet (I used chioggia, any kind will work)
  • 1 cucumber, peeled if not organic
  • 1 lemon, peeled
  • 3 carrots
Wash all fruits and veggies. Cut to fit size of your juicer's chute. Juice. Add a few ice cubes and enjoy!


Sunday, July 15, 2012

BBQ Chickpea Burgers


I always have trouble finding the perfect vegan (and gluten free) veggie burger recipe.  I know many of you out there have the same problem.

Vegan veggie burger recipes are notorious for making patties that don’t stick together well.  When I saw this recipe (@OhSheGlows) for burgers with a chickpea base I was curious as to how they would hold up.  For as many times as I’ve made falafel (and for the record, I LOVE to eat falafel), it has never occurred to me that making a veggie burger with a base of chickpeas (and rice) just might work.  The verdict: it does!

Because it has been so hot lately, I’m totally a fan of any recipe that allows me to make a big ol’ batch of somethin’ that can be stored in the fridge for a few days.  I tend to snack a lot throughout the day so it’s always nice to have something with a decent amount of protein and fiber to grab instead of tortilla chips or some other nutritionally flimsy snack. 

I only used half a jalapeno because I’m not too fond of spicy things, but did want a little bit of the flavor that jalapenos contribute.  I also substituted grated zucchini for the red bell pepper.  I like to eat these pretty simply; wrapping them up in a huge romaine lettuce leaf, perhaps with a small dab of BBQ sauce, hummus, or just as is. 

  • 1 cup dry/uncooked chickpeas (or 2 & 1/4 cups cooked chickpeas)
  • 1/2 cup dry brown rice (or 1 & 1/4 cup cooked rice)
  • 3 tbsp sunflower seeds
  • 2 large garlic cloves, minced
  • 1/2 cup grated zucchini
  • ½ - 1 jalapeno, seeded and diced
  • 1/4 cup yellow onion, diced
  • 1 small carrot, grated
  • 1/4 cup minced fresh parsley
  • 2 tbsp BBQ sauce
  • 1/2 cup GF breadcrumbs
  • 2 tbsp ground flax
  • Fine grain sea salt, to taste (I used 1 tsp)
For dry chickpeas: Soak overnight (or at least 12 hours) in a large bowl filled with water. The next day, drain and rinse chickpeas well. Place chickpeas in medium-sized pot with plenty of water (I don't really measure). Bring water to a boil, lower heat, then cover and allow to simmer for about 1 hour. At this point, chickpeas should be tender and you can let some cool down and test them out. Drain and rinse. Allow to cool (at least 15 minutes) before using.

Cook that rice: Bring 1 cup of filtered water to a boil in medium saucepan. Add 1/2 cup dry brown rice. I also add about 1/4 of a veggie bouillon cube. Reduce heat to low. Cover. Simmer on low for about 30 minutes, or until most of the water is absorbed. Turn off heat and let sit (covered) for 10 minutes. 
  1. Chop/grate vegetables. Place all veggies together in large bowl and add half the salt (or about 1/2 tsp.).
  2. If using canned chickpeas, drain and rinse now.
  3. Add parsley to food processor and chop until fine. Add chickpeas and cooked rice to food processor and pulse until coarsely ground (be careful not to process too much, it will be too mushy and leave you with sloppy patties)!
  4. Add the parsley, chickpeas, and rice mixture to the bowl with veggies. Mix well. 
  5. Now, stir in the sunflower seeds, BBQ sauce, breadcrumbs, and flax meal. Add the other 1/2 tsp. of salt, or to taste. 
  6. Preheat non-stick skillet over med-high heat. 
  7. Form patties and cook on skillet about 5 minutes for each side, or until browned. I forget exactly how many this recipe made, but it was at least 8. I like mine on the thinner side, however. 


Saturday, May 12, 2012

Welcome to the Wonderful World of Juice!

A few months ago I got a great birthday gift from the boyfriend. He got me a juicer! So since then I have been experimenting with many different veggie juice combos, and reading a lot about juicing and how beneficial it is for detoxing the body.

Drinking veggie juice may take a little getting used to at first, so if you're new to juicing I suggest starting with a base juice of beet and/or carrots (they're higher in sugar than other veggies) then add your greens to the base. 

 Although acidic tasting, lemons actually help to alkalize your body. This helps to reduce inflammation. Lemons are also a good source of vitamin C. *

Another staple of my juices is parsley. I actually hate parsley, but I've found that its taste is milder and more tolerable in juice form. Parsley is a decent source of iron and is high in vitamins K and C. As you may know, iron absorption is facilitated by the addition of vitamin C! Bonus! Parsley has awesome detoxifying properties. From what I've read, though, don't go overboard on the parsley juice, it can be toxic in amounts greater than 1/2 cup - 1 cup. This potential toxicity is increased in pregnant women, so if you're preggers maybe just steer clear of the parsley juice. 

Golden beets
Beets are another one of those detoxing powerhouses. Because of their higher sugar content, always mix these with green veggie juice (cucumber, kale, spinach, parsley, etc.) to avoid a blood sugar spike. Beetroot contains high amounts of nitrates, which are converted by the body into nitrites which then act as vasodilaters. This means that beets can increase blood flow (and therefore, oxygen) to areas that need it... like the brain! In addition, beet juice helps to cleanse the liver and gallbladder. 


Parsley-Lemon-Beet Juice

  • 1 small to medium-sized beet
  • handful of parsley (or about half the bunch)
  • 1/2 lemon, peeled (the skin contains oils that might make your juice taste a little funky)
  • 1 cucumber, peeled if not organic
  • 1-inch chunk of ginger root, peeled (optional)
Put all ingredients through the juicer. Enjoy as soon as possible!


* I am not a medical professional. If you have health conditions (diabetes, gallstones, etc), please consult your doctor before consuming juices. Thanks! * 

Friday, April 20, 2012

Karyn's Cooked restaurant - in Chicago

Karyn's cooked has been on my restaurants to visit wish-list for quite some time. The boyfriend and I dined here a few weeks ago. Here are my thoughts on our visit…


I ordered the carrot-tofu Flautas, which were $13. The flautas were a little too greasy for my liking, though the description does state that they are fried so I suppose I was warned. The carrot-tofu filling tasted a little soapy(?) and could have used a great deal more tofu. If I’m paying $13 bucks for a dish, it better have a substantial amount of protein, ya dig? I’m guessing the flautas barely had a serving’s worth of tofu in them.  But the flautas did come with a decent side of refried black beans, some tortilla chips, as well as a huge scoop of guacamole and some mixed greens with salsa.

I wasn’t impressed with what the boyfriend got (Southern Comfort entrĂ©e). I’m not that fond of collards in the first place, but these didn’t taste that fresh to me and looked like maybe they were prepared from frozen greens? The dish did come with a HUGE portion of beans, though, with rice and cornbread on the side (not gluten-free, by the way).

I really liked the carrot ginger soup. Not too gingery, and it had the perfect consistency.  They also serve Mighty Leaf tea, so that’s pretty rockin'. Overall, I would probably give Karyn’s another shot, as I was not that impressed with our first visit. It wasn’t BAD, but it wasn’t GREAT


Tuesday, February 21, 2012

"Ritz"-y Flax Crackers

These buttery little crackers are very similar to Ritz crackers! I always ate Ritz crackers with chicken noodle soup when I was a kid. Like Ritz crackers, these gluten free flax crackers love spending quality time with a hot cup of soup or chili.

I made mine a wee bit tiny because I ended up ordering some cute little Japanese carrot shape cutter things from internet land. Their tiny size really makes them perfect for scooping up a handful and sprinklin' them all up in a soup!

As you can see when compared to the size of the apple,
 these are some tiny crackers!
"Ritz"-y Flax Crackers
Recipe from Free Eats Food


  • 1-3/4 cups gluten-free flour mix
    • Mix: 2 cups brown rice flour, 1/3 cup tapioca starch, 2/3 cup potato starch
  • 1/4 cup flax meal
  • 3/4 tsp. guar gum (or xanthan gum if you tolerate it)
  • 1/2 tsp. baking soda
  • 1.5 tsp. baking powder
  • 1 tsp. sea salt
  • 2 Tbsp. + 1 tsp. granulated sugar
  • 6 Tbsp. non-hydrogenated shortening (Earth Balance)
  • 1/2 tsp. apple cider vinegar
  • 1 Tbsp. olive oil
  • 1/4 cup soy/almond/rice milk + 2 Tbsp. if needed
* Note: I had a hard time with this dough. You most likely will too. It appears extremely dry and I ended up adding an extra 3-4 Tbsp. of liquid before refrigerating it in plastic wrap. The original recipe said to refrain from adding too much liquid, but I had no problem adding the amount that I did. 

  1. Place the 6 Tbsp. of shortening in freezer until chilled and firm.
  2. In a large bowl combine the dry ingredients. Mix well. 
  3. In a small bowl, combine the liquids. Set aside. Reserve the extra 2 Tbsp. of liquid if needed (if dough is too dry).
  4. With a fork (or pastry cutter if you're super fancy) work the chilled shortening into the dry ingredients until you have a bunch of tiny crumbles.
  5. Add liquid ingredients to the dry/shortening mixture and mix with fork. The dough does not really hold together at this point. If it does for you, great. For me it didn't, so this is where you want to add that extra liquid if you need it.
  6. Get out a piece of plastic wrap and scoop the dough onto it. Kind of knead the dough a bit for a few minutes until it seems sufficiently combined. 
  7. Press down the dough into a little compact nugget and wrap the plastic wrap up around it.
  8. Place dough in fridge for 1 hour.
  9. Preheat oven to 375F.
  10. Roll dough out on floured surface (or a cutting mat) with a piece of plastic wrap over the top of the dough. Roll dough out to about 1/8" in thickness
  11. Cut out whatever shapes you want for your crackers. 2" diameter rounds is more of a typical cracker size : )
  12. Bake on a parchment lined baking sheet for 8-10 minutes, depending on thickness of crackers. 
  13. When golden brown remove from oven and cool on racks.