Showing posts with label chocolate. Show all posts

Friday, February 10, 2012

Black Bean Brownies

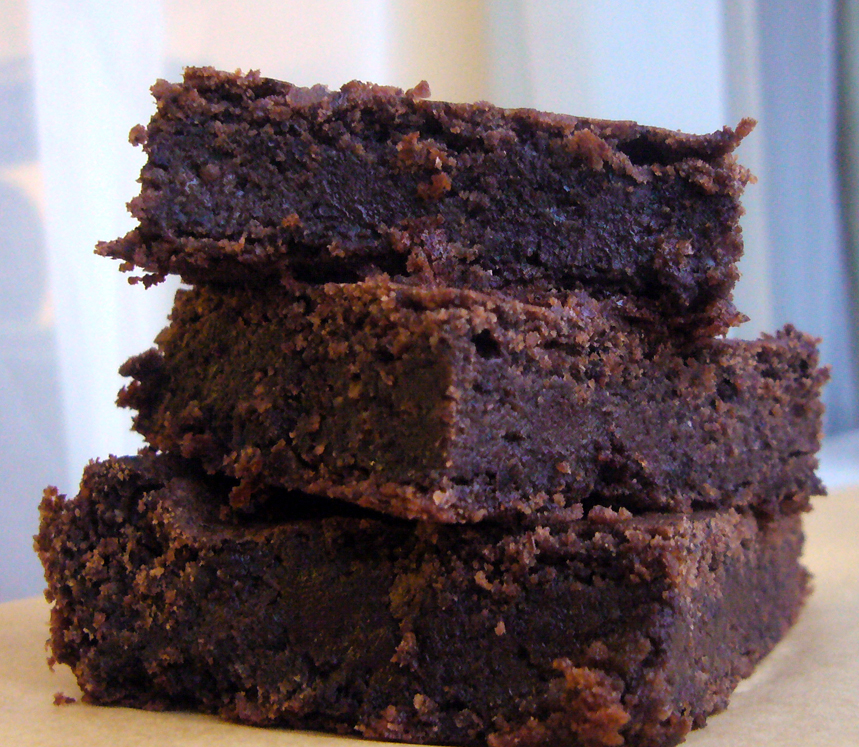
In the years that I've spent browsing recipes on the inter-webs I've always come across a recipe for brownies... made with black beans. The thought of beans in brownies always grossed me out, to be completely honest. But I'm here to tell you that adding beans to brownies is totally NOT gross! I promise. The beans add a moist fudgy-ness to the brownies and your tongue won't even be able to detect them!

I came across this recipe for black bean brownies which were made with 3 eggs. I just took out the eggs, and added in the equivalent of 3 flax "eggs".


  • 3/4 cup dried black beans, rinsed, and soaked overnight in water in the fridge, 
  • 3 flax "eggs" --> 3 Tbsp. flax meal + 8 Tbsp. warm water, mix and let sit for at least 15 minutes to "gel up"
  • 5 Tbsp. vegetable oil, I used a mixture of 3 Tbsp. canola + 2 Tbsp. coconut oil
  • 1 cup sugar/muscovado/sucanat
  • 1/2 cup cocoa powder
  • 1/4 cup GF oat flour
  • 1/2 cup almond meal
  • 1 tsp. vanilla extract
  • 1/2 tsp. baking powder
  • 3/4 cup vegan chocolate chips (I use EnjoyLife brand)
If using dried beans: drain soaked beans, place in large pot and cover with water. Bring to a boil, then reduce the heat and simmer for 1 hour until beans are tender. Drain. Let cool.

  1. Preheat oven to 350F/180C. Line a 11x7in. pan with parchment paper or grease with cooking oil.
  2. Add the cooled cooked beans to food processor and blend until a smooth paste has formed.
  3. Add the flax eggs and oil to processor, pulse to combine.
  4. Add sugar, cocoa, almond meal, vanilla, and baking powder. Process until well combined.
  5. Add chocolate chips or chopped chocolate and pulse until mixed. 
  6. Spoon the mixture into prepared pan. Bake for 50-60 minutes or until a toothpick comes out clean when inserted. I first baked mine in a 9x9in. pan and it took quite awhile for them to bake! Definitely took over an hour. If baking in an 11x7in. pan it might take less time to bake. Let cool before slicing!

Thursday, October 6, 2011

Chocolate Granola (GF,V) - Vegan MoFo continues...

I eat granola for breakfast every.single.day. I do get a bit tired of it every now and then, and with the colder weather creeping up on us... I'll probably switch to making oatmeal in the morning. For a little bit. I am just simply not a morning person and the last thing I want to do when I wake up is cook. Even if it does just mean boiling some water and stirring. 


But I always come back to my favorite breakfast food of all time. Tried and true, reliable and crunchy.  GRA-NO-LAHHH


Ingredients
  • 4 cups GF rolled oats
  • 1/4 cup flax seeds
  • 1/4 cup sesame seeds (optional)
  • 1/2 cup slivered almonds
  • 1/2 cup unsweetened cocoa powder
  • 1/2 cup canola oil
  • 1/2 cup maple syrup
  • 1/4 cup peanut butter
  • 1/4 cup chocolate hazelnut butter (optional), if using this, omit salt
  • 1/2 tsp. salt
  • 1/2 tsp. vanilla extract
  • 1/2 cup vegan chocolate chips (optional)
1. Preheat oven to 350F degrees.
2. In a large bowl, stir together dry ingredients. In small saucepan, heat up all liquid ingredients until peanut butter is melted. Add vanilla extract at end after removing pan from heat. 
3. Pour heated liquid ingredients into bowl with dry ingredients. Mix well. Spread onto prepared baking pan. I use a 9x13 cake pan lined with parchment paper. 
4. Bake for 35-40 minutes, making sure to stir at about 20 minutes. Add chocolate chips after the granola has cooled. Unless you like that melted chocolate sorta thing ; )


Wednesday, July 13, 2011

Crispy Peanut Butter Balls

These little guys are quick and easy to make. 


I found that making these with just almond butter (based on this recipe) made them a little bit too dry for my liking. I prefer to make these with peanut butter! I've been struggling with a peanut butter addiction for quite some time now. These treats give me the quick PB fix I need in no time flat. 
These are also super tasty when made with chocolate hazelnut butter! I use Justin's brand.


Ingredients
  • 1 cup crispy GF rice cereal (I used Nature's Path)
  • 1/2 cup peanut butter (or almond butter, or get crazy and use a mix of both!)
  • ¼ cup maple syrup or brown rice syrup (or agave maybe?)
  • ½ tsp. vanilla extract
  • ¼ cup vegan chocolate chips (optional)
  1. Line a plate or baking sheet with parchment paper. 
  2. In a large microwave-safe bowl, combine wet ingredients: peanut butter, maple syrup, and vanilla, and microwave for 35-45 seconds. Stir. Repeat if the peanut butter is still not melted (or if you have a super old school microwave, like me).
  3. Add crispy rice cereal and chocolate chips (if using) to the wet ingredients and stir to coat.
  4. Wet hands with water and roll mixture into balls. Place on parchment paper.
  5. Place in refrigerator until hardened. Store in an airtight container in fridge. 

Saturday, July 2, 2011

Chocolate Oat Walnut Bars

This is a recipe I found over at (never home) maker. These tasty bars are full of good-for-you fats found in walnuts and coconut oil. The walnuts provide you with a healthy dose of omega-3 fatty acids (anti-inflammatory), and coconut oil has been found to support thyroid and immune system function. About 50% of the fat in coconut oil is a type called lauric acid. You can read about coconut oil and its benefits here.


Ingredients
  • 3/4 cup steel cut oats, processed until powdery
  • 3/4 cup walnuts, processed into a meal
  • 1/4 cup unsweetened coconut flakes
  • 2 Tbsp. cocoa powder
  • 1/4 cup honey (or maple syrup)
  • 2 Tbsp. coconut oil
  • 1 cup vegan chocolate chips
  • 1/4 cup peanut butter (or almond butter)
For this recipe, however, I didn't have any steel cut oats on hand so I ended up using plain rolled oats. I think this may have been the reason as to why my bars ended up a bit dry and powdery. I had to store them in the fridge to keep them more solid. 


  1. Preheat oven to 250 degrees F.
  2. Whisk together the processed steel cut oats, walnut meal, cocoa powder, and coconut flakes.
  3. In a separate bowl, add honey (or maple syrup), coconut oil, and peanut butter. Stir with electric mixer. Then add in the chocolate chippies.
  4. Lightly oil an 8x8 pan with coconut oil. I used a bread loaf pan. Pour in the mixture and press down.
  5. Bake for 20 minutes. Then, remove from oven and let cool for 10 minutes. Increase the oven temperature to 350 degrees F.
  6. Put the dish BACK IN THE OVEN for another 15-20 minutes, or until lightly browned. Remove and let cool. 
  7. Store in refrigerator to help them solidify a bit more. 

Enjoy with a glass of ice-cold soymilk 
(or almond milk, coconut milk...you get the idea)!

Thursday, February 17, 2011

Peanut Butter Cups (no cooking required)

I don't usually rely on my microwave for making food stuffs. However, this recipe is totally an exception! These tasty little treats are super easy to make, and are even easier to eat! Maybe a little too easy...


Ingredients

  • 1.5 cups vegan chocolate chips (you can also use Baker's Semi-Sweet Baking Chocolate Squares)
  • 1 cup peanut butter (or you could use a mixture of dark chocolate peanut butter AND peanut butter like I did)
  • 1/2 cup powdered sugar
  • Mini paper muffin cups
Powdered sugar, peanut butter, dark chocolate PB.
Directions
  1. Place chocolate in microwave-safe bowl. I just used a pyrex bowl. My microwave is super old so I had to heat the chocolate with 3 intervals of 45-seconds. Stir until creamy.
  2. Using a spoon, spread some of the melted chocolate into the bottom of each muffin cup making sure to get the chocolate into the little crevices of the cup. This step takes a bit of patience, things get a little messy!
  3. Place cups in freezer until hardened, just a few minutes. 
  4. In another bowl add the peanut butter and microwave for about 45-seconds until warm. Then add in the powdered sugar and stir until creamy.